
❈
These plans are for the DIY Woodworker. They will teach you how to build a variety of bed styles, for kids and adults ~ brought to you in association with Woodstore.net. |
☑ 3-in-1 Bed for All Ages-Woodworking PlanLike a best friend, this bed grows up with your child.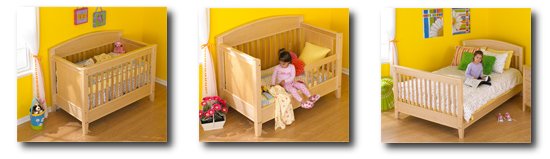 ▸ Crib Size: 57" W x 32" D x 44" H ▸ Toddler Size: 57" W x 32" D x 43" H ▸ Full Size: 57" W x 83" D x 43" H Starting as a crib for a newborn, this 'Sleep System' easily changes into a bed for a toddler, and then into a full bed, serving a child well past adolescence. Simple decorative connector bolts and concealed cross dowels make these quick changes possible. Build all the parts now and be years ahead, or choose any one of the three beds to meet current needs. |
☑ Pencil Post Bed Plans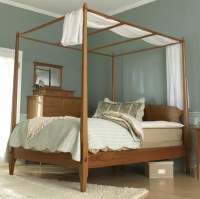 Slender tapered bedposts give the pencil-post bed it name. Topped with a canopy, called a tester, this beauty fits many decorating styles. Plus they've added in-depth information on attaching the bed-bolt brackets that make this bed easy to disassemble and move. Includes plans for building and using the taper jig to make the graceful pencil post legs.
▸ Overall Bed Dimensions: 84" L x 64" W x 84" H ▸ Also see: Matching Pencil Post Nightstand |
☑ Shaker Bed Plans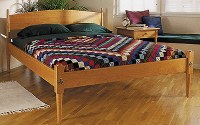 Designed and built for a queen-sized bed. For ease in assembly and moving, the bed features kd hardware.
▸ Measures 87" L x 68" W ▸ Headboard stands 36" tall |
☑ Country Fresh Oak Bed Plans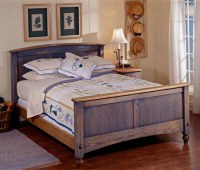 Dreamland takes on a whole new look with this solid-oak queen-size bed design. Frame-and-panel construction makes for lifelong endurance. Also see: Country-Fresh Bedroom Suite Super Bundle
▸ Measures 88⅛" L x 67½" W ▸ Headboard stands 43¼" tall |
 Build Your Own Bed Plans
🌵 Search azWoodman