
❈ Creating Splined-Miter Joints
... a woodworking tutorial © WOOD® Magazine
|
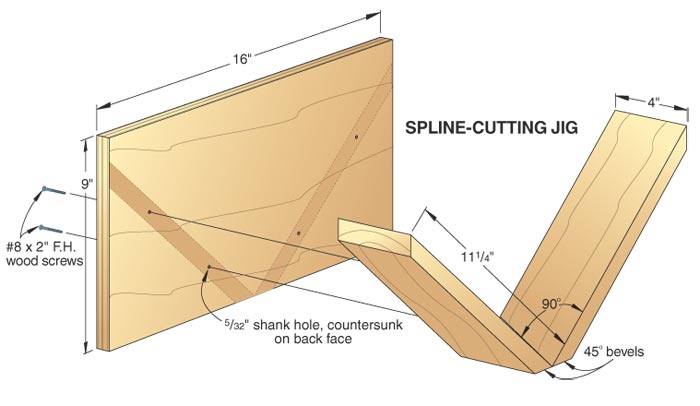
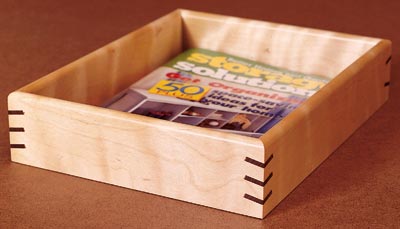 A slight tilt of a saw blade gives your corner splines a whole new look. It doesn't take much work to put a new spin on traditional splined miter joints. Just install the splines at an angle, as we did as shown here on a Maple-and-Walnut Letter Tray, and you get eye-catching results. First, make a simple spline-cutting jig for your tablesaw, as shown below. Then, mark three evenly spaced spline locations on a piece of scrap the same width as the tray side. A slight tilt of a saw blade gives your corner splines a whole new look. It doesn't take much work to put a new spin on traditional splined miter joints. Just install the splines at an angle, as we did as shown here on a Maple-and-Walnut Letter Tray, and you get eye-catching results. First, make a simple spline-cutting jig for your tablesaw, as shown below. Then, mark three evenly spaced spline locations on a piece of scrap the same width as the tray side. |
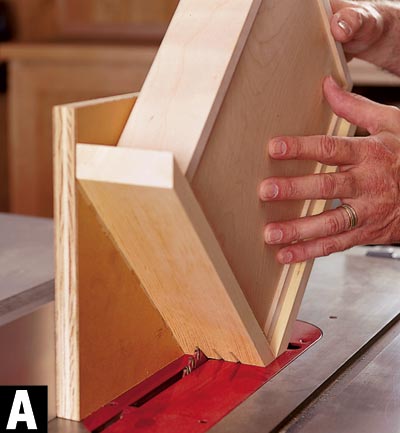 Double-check the orientation of your work-piece before cutting. Here we're holding the bottom of the tray to the left, so the slots will point downward. |
Install a blade in your tablesaw that produces the flattest possible kerf bottom. (We used an outside blade from our dado set.)
Tilt the blade to 15°, and raise it so that it extends about halfway into the mitered corner. Set your jig against the tablesaw rip fence, place your marked scrap in the jig, and adjust the fence to cut a test slot. Now make the other slots, readjusting the fence between cuts. When you're satisfied with the design, place clear packing tape around the workpiece corners to reduce chip-out. Hold the workpiece firmly in the jig, and cut as shown in Photo A. |
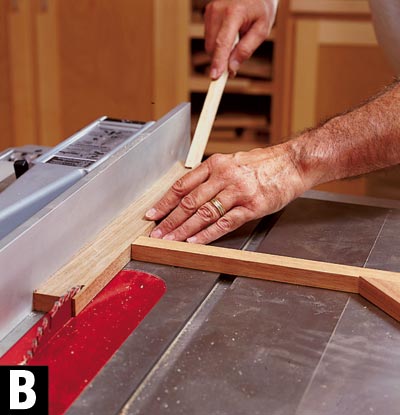
If one pass won't produce enough spline stock, clamp a stop to the table before ripping. Slide the fence between cuts to set the board against the stop. |
Cut the top slot in each corner, adjust the fence, cut all four middle slots, adjust again, and do the bottom slots. Remove the tape.
Rip spline stock from the edge of a board of contrasting stock, as shown in Photo B. Match its thickness to the kerf - usually 1/8". Then, cut individual splines from the strips, making them slightly longer than the slots. Spread yellow glue on the splines, slip them into place, and let the glue dry. Trim them off at the surface with a flush-cutting saw or a Ikedame Small Dovetail Saw followed by a chisel. Sand flush. By varying the number and placement of the splines, you can come up with other designs. You might try different saw blade angles, too. |
|
» Content © WOOD® Magazine » Photographs: Hetherington Photography » Illustration: Roxanne LeMoine |
|
🌵 Search azWoodman