
 ❈ Keepsake BoxLearn gluing techniques as you assemble this hardwood box ... content © Rockler.com |
|
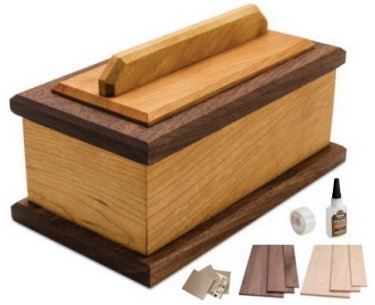 |
Parts to Purchase:▸ ½" Walnut Lumber▸ ½" Cherry Lumber ▸ ¼" Cherry Lumber ▸ Wood Glue Other Materials:▸ Wide Packing Tape▸ Sandpaper ▸ Wipe-on Finish |
❈ Assembly Gluing Technique: |
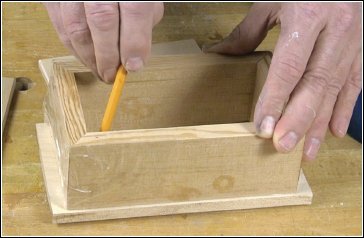
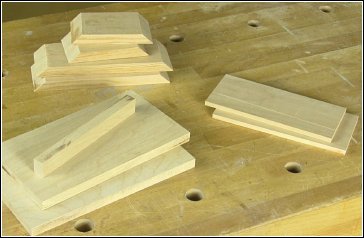 1. Gather Your PiecesThere are nine pieces that will be assembled to make the box. Four of them are the mitered sides and ends. Sand them smooth now. |
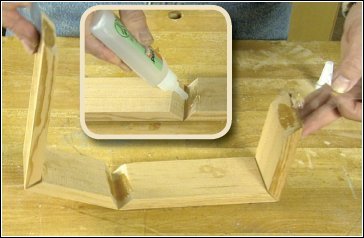 2. The Box Sub-assemblyLay a long piece of 2" wide packing tape, sticky-side-up, on the bench. Carefully lay out the sides and ends on the tape, with the miters up. |
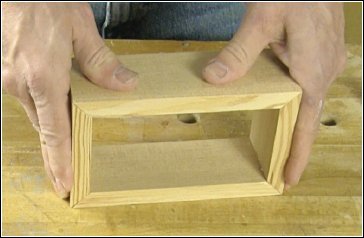 3. Roll the Pieces TogetherApply glue and "roll" pieces into a rectangle. Tape the last corner closed and allow the glue to cure. |
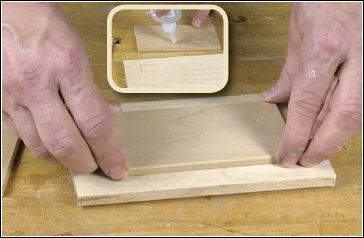
 4. Chamfer the EdgesChamfer the edges of the flat pieces and the handle with a bearing guided 45° bit in a router table. |
 5. Mark the Plug LocationMark the location of the alignment plug on the underside of the top. Apply glue. |
 6. Glue the Plug in PlacePlace the alignment plug on the underside of the top. Press down firmly to secure the plug. |
🌵 Search azWoodman