
Music Box Plan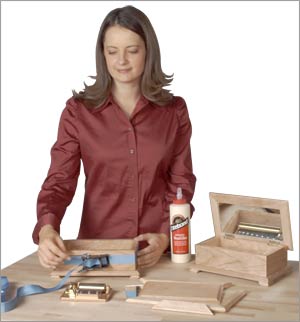 Although this music box plan looks complicated to make, it was designed so that even a novice woodworker can construct it. Essentially, it is just a box: the top and bottom frames are made from a simple molding. The music box holds any of Rockler's 18-note, 30-note or 72-note musical movements. Although this music box plan looks complicated to make, it was designed so that even a novice woodworker can construct it. Essentially, it is just a box: the top and bottom frames are made from a simple molding. The music box holds any of Rockler's 18-note, 30-note or 72-note musical movements.
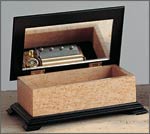 Create an exotic finish is just an ebony stain on walnut, highlighting the natural beauty of birdseye and burl figuring. Just use walnut wood for the top and the base, and birdseye maple for the sides. Create an exotic finish is just an ebony stain on walnut, highlighting the natural beauty of birdseye and burl figuring. Just use walnut wood for the top and the base, and birdseye maple for the sides.
NOTE: Rockler recommends using walnut wood for the top and base, and birdseye maple for the sides. As shown in the photo, ebony stain was used on the walnut to off-set and highlight the natural beauty of the birdseye maple and its burl figuring. 📌 Content © Rockler.com ~ The products on this page are available at Rockler.com. |
Bill of Materials |
|||
| Piece | Qty | Dimensions | Required Machining |
| 1. Top Molding (Front & Back) | 2 | ½" x 1" x 10" | Shape with classical multiform bit. Plow groove for top panel, cut 45° miters on each end. |
| 2. Top Molding (Sides) | 2 | ½"x 1" x 6" | Shape with multiform bit. Plow groove for top panel, cut 45° miters on each end. |
| 3. Base Molding (Front & Back) | 2 | ½" x 1" x 10" | Shape with multiform bit. Plow groove for base, cut 45° miters. Drill pilot holes. |
| 4. Base Molding (Sides) | 2 | ½" x 1" x 6" | Shape with multiform bit. Plow groove for base, cut 45° miters. |
| 5. Top Panel | 1 | ⅜" x 4¼" x 8¼" | Shape with ¾" cove bit. |
| 6. Feet | 8 | ⅜" x 1" x 1½" | Shape with multiform bit, 45° top miter, 45° end miter. |
| 7. Box Sides | 2 | ½" x 2¼" x 9" | 45° miter. |
| 8. Box Ends | 2 | ½" x 2¼" x 5" | 45° miter. |
| 13. Base | 1 | ¾" x 4¼" x 8¼" | Rabbet shoulder, drill two-stage hole for turn key. |
| 14. Brass Screws | 4 | #5 x ¾" | |
| 15. Brass Hinge | Pair | 1¼" x ½" | 70391 - Stop Hinges |
| 16. Mirror | 1 | ⅛" x 4" x 8" | |
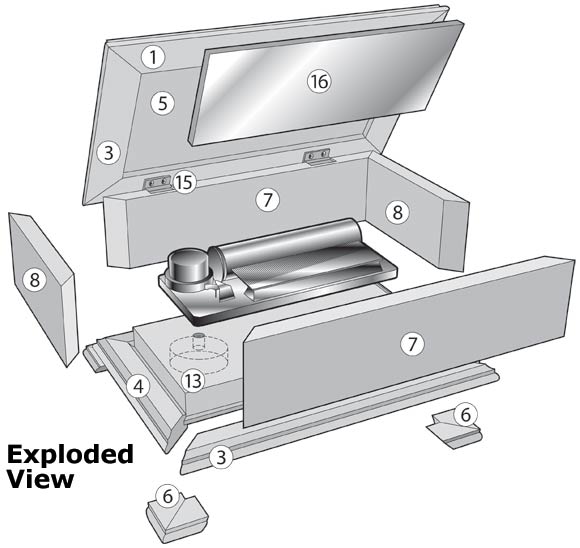
Elevations
 Decorative Molding Decorative Molding1. Make the top and base moldings (pieces 1,2,3 and 4) from a couple of 40" lengths of stock using a #80637 classic multiform router bit (shown Figure 1 at right). Plow a 1/8'' groove in the top molding for the top panel (piece 5) using a zero-clearance insert in your table saw, and a similar 1/8" groove in the base molding for the base (piece 13), as shown in Figure 2. A classic multiform router bit. |
 2. Make the molding for the feet (pieces 6) from one 30" length of 3/8" stock using the same router bit (see Figure 3). Make a 45° cut on each end of each foot, making a left and right piece (see Figure 4). Miter, glue and clamp left and right pieces together to create the feet, and sand them after the glue dries. 2. Make the molding for the feet (pieces 6) from one 30" length of 3/8" stock using the same router bit (see Figure 3). Make a 45° cut on each end of each foot, making a left and right piece (see Figure 4). Miter, glue and clamp left and right pieces together to create the feet, and sand them after the glue dries. |

Box Assembly1. Cut the box sides (Piece 13) and ends (pieces 7 and 8) to size, then use your miter gauge to cut 45° miters on each end of each piece. Pre-sand the inside faces, then glue and clamp the box together using a web clamp to apply even pressure all around.Base Assembly1. Cut the base to size, then use your table saw to create a 1/8" rabbet depth along each edge, to fit into the base molding.2. Glue the base molding around the base center and sand. 3. Attach the feet to the base assembly with glue and clamps. Top Assembly 1. Pre-sand the inside face of the top molding. 1. Pre-sand the inside face of the top molding.2. Cut the top panel to size, then use a 1/4" cove bit to shape its top edges (see Figure 5), leaving a 1/8" lip to be inserted into the top molding. Sand the top face of the panel. 3. Glue the top molding around the top panel and sand flush. Final Assembly1. Finish the box. For the ebonized look, stain the top and base assemblies with a water soluble homestead dry dyes. Then apply a clear finish over both that and the undyed box.2. Position the base on the upturned box, drill and countersink the pilot holes (see Figure 6), and install the screws (pieces 14). 3. Now center the top assembly on the upright box. Cut mortises in the box and attach hinges (pieces 15) 1-3/4" in from each end of the top. 4. Follow the manufacturer’s instructions,drill a 3/8" deep bore for the turn key in the bottom of the base (see Figure 6), using a 35 mm. boring bit. Follow with a 5/16" through hole. Mount the musical movement 5. Glue the mirror (piece 16) in place. |
 |